How Do Tone Capacitors Work?
The Tone Cap is an incredibly useful tone-shaping tool. Understanding the basics will help you choose the right tone cap for your style. There are a ton of variations of […]

I remember learning how to solder like it was yesterday. What I remember most is just feeling awkward, like watching a baby deer trying to walk for the first time. Soldering is one of the most critical skills to have when working on your guitar. I always hear people say “I’m not good at soldering” or “I can never do that.” Because of this, you see those cheap “clip-on” harnesses and connections. That’s cool and all, but what happens when that connection fails?
I understand it seems like a daunting skill to learn, but it’s really easy when you get the hang of it. At Fralin Pickups, we solder all-day, every-day at the shop. We’ve learned a few tricks to help you, so, here they are:
Yep. This is a big one. There are many types of soldering irons out there, and choosing one can be a little confusing. We have a few varieties laying around the shop, but our main workhorse is the Weller® WD-1 and WP-80 pencil. Is this a little overkill for the home enthusiast? Definitely. However, if you’re going to be soldering a lot, we really recommend this model for a few reasons: Weller® makes excellent products, and this model is a Temperature Controlled Soldering Station.
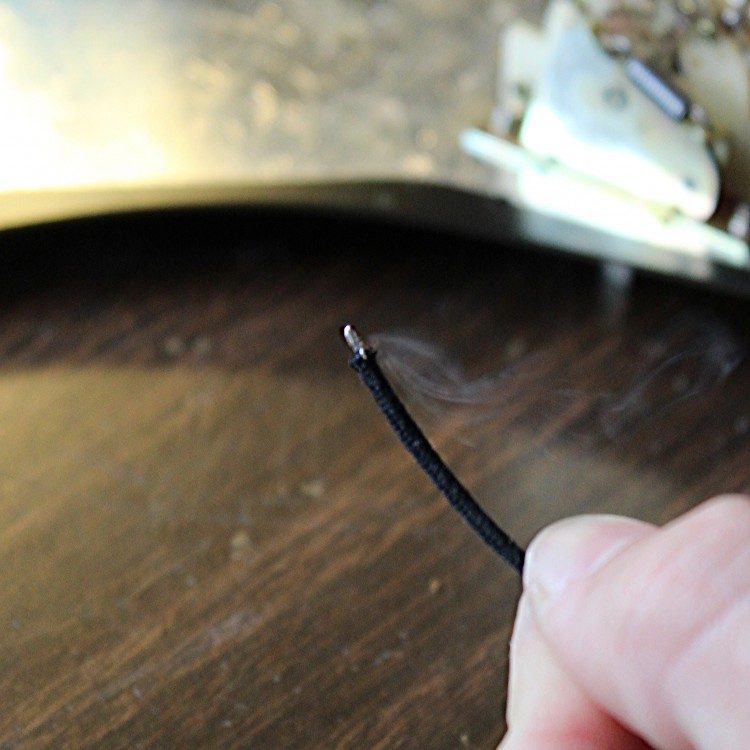
Having a temperature-regulated iron is helpful because you might be just attaching a wire to a switch one minute, then the next you are heating a baseplate or back of a pot, which disperses more heat. Cooking your solder too hot can damage parts of the guitar: it can make the solder too “watery” and if it drips, it’s easy to ruin a 5-way switch with it. If your soldering iron or pencil doesn’t get too hot, you’ll be there forever waiting for the back of the volume pot to cook, and you might get a Cold Solder Joint.
Here’s a useful tip: DO NOT USE SOLDERING GUNS AROUND PICKUPS. Soldering Guns are so powerful that you can degauss, or de-mag your magnets in your pickups. We never use these – we always make sure we use a Soldering Pencil.
This one again is a no-brainer. We use 44 Gauge Rosin Core Leaded Solder. Leaded solder is a lot easier to work with than unleaded or silver solder. You’ll get more consistent results and a reliable electrical connection with it.
NOTE: Always wash your hands after soldering with leaded solder. It contains lead. It’s poisonous when you ingest it, so don’t!
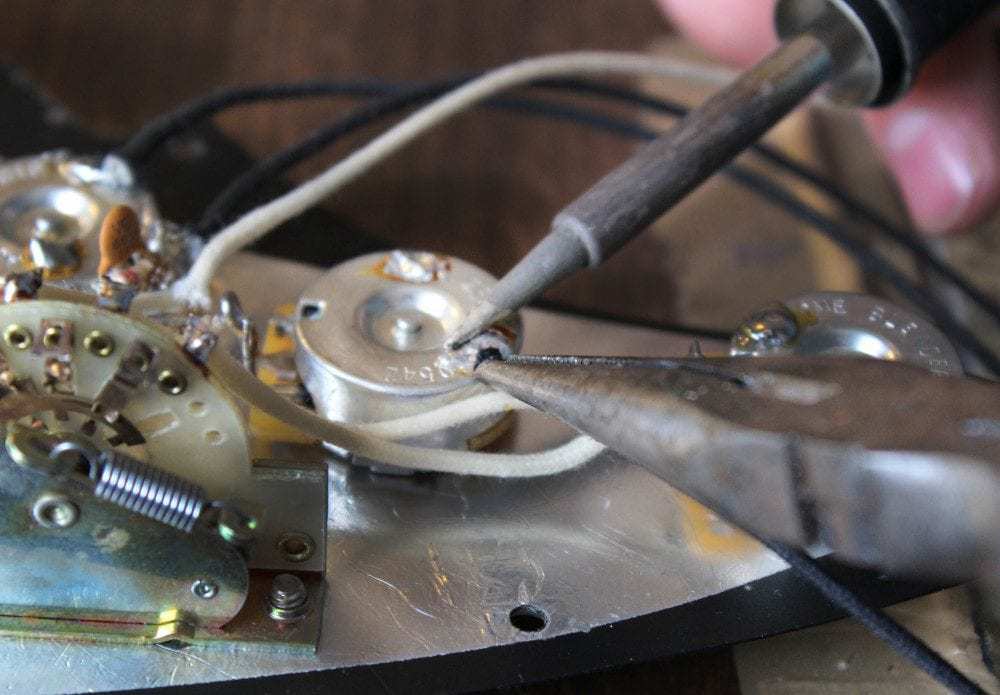
The best electrical connection is a Mechanical Connection. When soldering leads on to pots or switches, make sure you put a 90-degree angle in the wire before feeding it through the lug. This makes sure that the wire is secure and able to withstand some tugging.
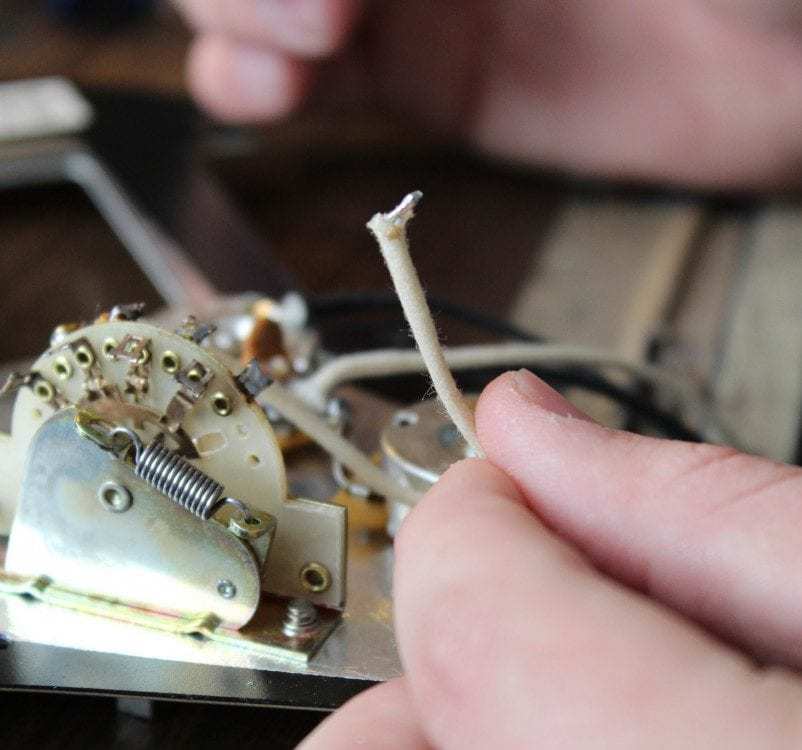
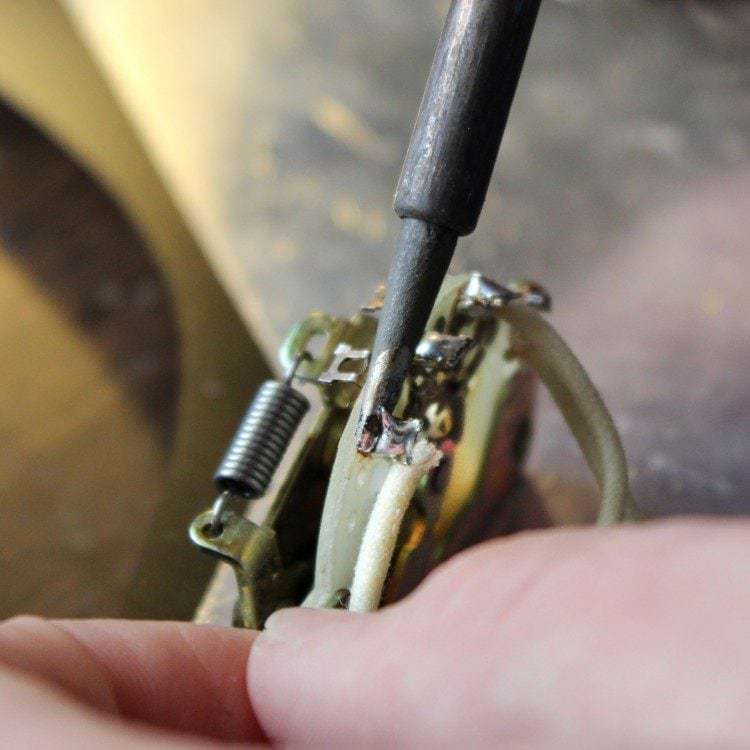
Pre-Tinning is as simple as getting solder on your wire and lug (or whatever you’re soldering to) before making the connection. This is a simple and easy way to make sure your connection is complete. A Cold Solder Joint may look like it’s connected, but in reality, it is not. There might have been some oil or gunk on your lead before making the connection, and the solder isn’t connecting everything.
Pre-Tinning your lead and your Lug of your switch or pot will make sure that all that gunk is burned off, and when you heat the joint, both soldered items join each other in harmony.
I’ve burned myself countless times trying to hold that wire in place waiting for the solder to cool (I’m pretty immune to the pain now). Don’t be like me, be smart! Use pliers or some tape to hold that wire in place while the solder sets temporarily. This is especially helpful when you’re holding ground leads to the back of a pot, where residual heat can keep those pools of solder runny for a bit.
If you’re first learning how to solder, I can’t stress enough how valuable space is. Having enough elbow room is so important to have a clean installation job. Soldering pickups into a pickguard? Unsolder the ground and hot connections to the jack and work on just the pickguard. Get all unnecessary items out of the way so you can quickly and cleanly get those pickups in the guitar, without the headache.
Planning is equally as important: make sure you have a diagram laid out and all the parts handy. Take pictures with your phone of the wiring in case you forget where that wire goes. Draw a quick sketch before you dive in. All these little tips are handy when you start learning how to solder and will make your installation or repair a lot easier to do. Well, there you have it! We hope this helps you have a little more confidence with the iron in hand.
Do you have any tips you’d like to share? Add them to the comments below!

10 Comments For This Post
Want to chime in to the conversation? Please do so! Please respect others.
What temperature do you have your soldering irons on for temperature controlled ones? Thanks
Normally between 700 and 800 Degrees Fahrenheit, depending on the work we’re doing.
I am having trouble separating the insulated wire from the hot. Any suggestions to make it easier would be helpful.
John
Hey John, if you’re using Cloth Lead, start with a sharp cut and make sure the wire is perfectly straight before attempting to push back the cloth insulator.
If you’re using Gibson Braided Lead, strip away a part of the metal braiding (saving some for grounding your pickup) and repeat the steps for the cloth lead, above. If you’re using 2, 3, or 4-conductor lead, invest in a good pair of wire strippers to make your job easier. Strip away the overall insulation, and remove the paper wrap, take all the bare shielding and twist into a neat wire, and then stip the individual leads.
(1) You suggest: 44 Gauge Rosin Core Leaded Solder. I have Forney 1/16 in. 1/4 lb. Rosin Core 60/40 Solder that I got from Home Depot. Is this good or if not can you suggest where to purchase the 44 Gauge Rosin Core Leaded Solder, other than Amazon where I won’t shop?
(2) I spoke with Zach and he said the Weller WE1010NA is good with this tip: ETA tip 0.062 mm/1.6 mm screwdriver. Do you agree or do I need another tip? I will be soldering the Humbuckers to the pots and switch, and grounding.
(3) Finally you say elsewhere on the site that the orientation for mounting Humbuckers is with the wires on the treble side, but then you say for the Neck Humbucker on the bass side. Is that correct? Neck – bass side, Bridge – treble side?
Thanks!
My Weller WE1010 came with the ETA pencil style tip, but I usually see techs use a flat tip, I guess ETB? Is there a preferred tip? Also, what gauge wire? .031, .040, etc? Thanks.
Mike
Hey Mike,
We normally use flatter tips, as their ability to retain heat is better than the pencil-style tips. The pencil tips are better for super precise soldering that doesn’t require a lot of heat, like circuit boards.
A flatter tip gives us better heat retention when cooking baseplates, covers, and pot casings.
We use .040 solder gauge.
Tyler
I appreciate you mentioning to make a proper mechanical connection with the wire. Too often I see tutorials where they guys just stick the wire though. Great tips!
Here’s what I do for Teles: First, do as much as you can on the control plate when it’s off of the guitar. I do a lot of 4-way switches so, there’s work to be done before it gets wired in. Next, protect the body with whatever you have that won’t be effected by any solder mishap! Then I use a thin, cardboard template with holes punched for the pots and switch lever. I make the template longer than the control cavity by about 2″ on each end and wide enough to cover both sides of the opening. You can also anchor the plate to the template with the pot hardware for more stability. Solder up your hot wires and grounds, remove the template and, voila! Done.
Use cigar box(es) to set your assembled unsoldered pick guard on to give you a stable surface. Works nicely. Learning to solder pot/Electronic cases only takes practice. Buy cheap, crappy ones and practice, value does not matter