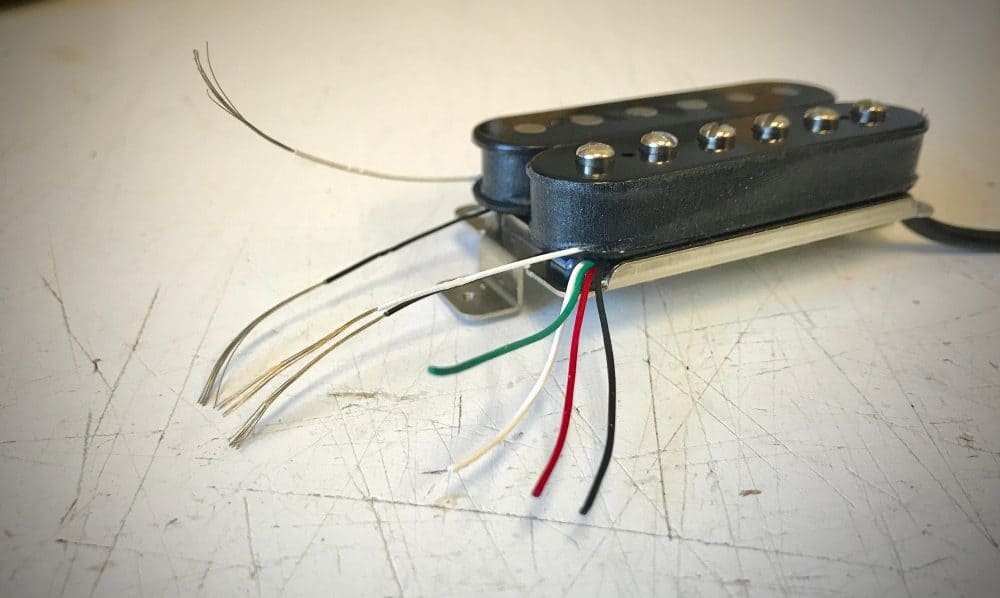
How Does Coil-Splitting Work?
Coil Splitting is a simple, usable way to add another dimension of tone to your guitar. You can essentially double your tone, with a flip (or pull) of a switch. You can use this to clean up a beefy humbucker or get your tone to “cut through” a lot more. If you want to understand what’s going on when you split your humbucker, read on!
THE BASICS:
A Humbucker‘s two coils are wired In Series. This means that the output of one coil is entering another coil. Series wiring is what makes a humbucker sound so loud and strong. Humbuckers have a darker, beefier tonal quality to them – but what if you want Single Coil clarity? Enter Coil Splitting:
Coil Splitting involves changing where your humbucker’s leads go. Essentially, Coil Splitting involves connecting both leads of the Slug Coil to ground, essentially canceling out the coil. Let’s take look at how a regular Humbucker is wired:
NORMAL HUMBUCKER WIRING:
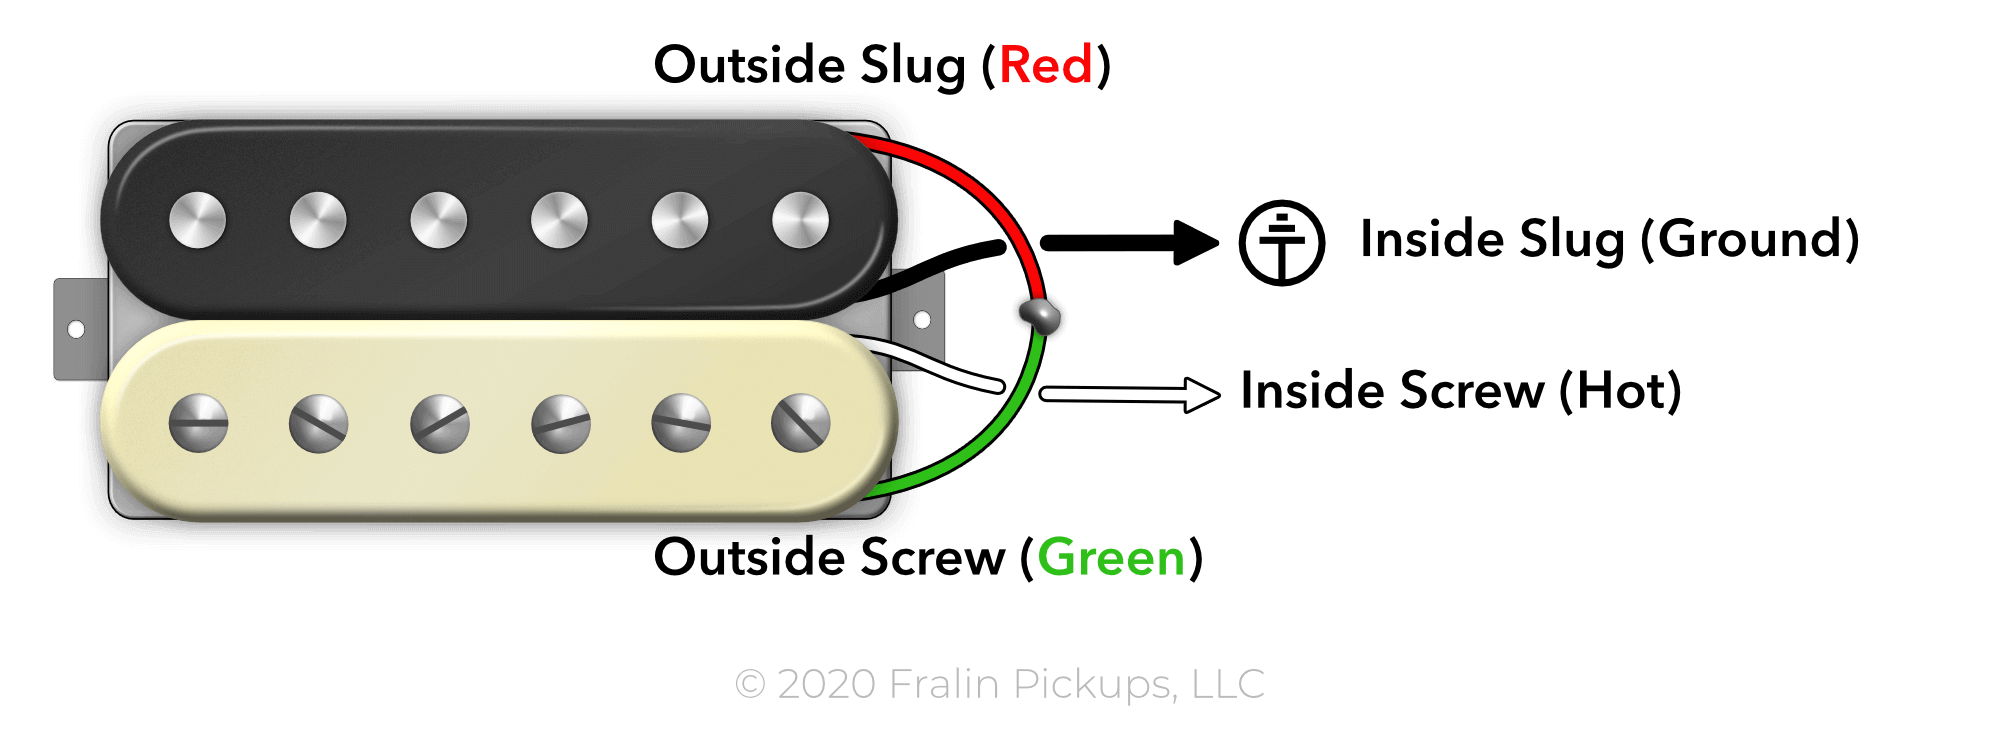
Let’s look at the above image. As you can see, a normal humbucker is wired by connecting the Outside Leads of each coil together, and sending the Slug Inside Lead to ground, and the Screw Inside Lead to the switch (hot).
LEADS:
Note that you need to have either 3-Conductor Wiring or 4-Conductor Wiring to split a humbucker. These conductors have each coil it’s separate output, all the way down the lead. If you have a humbucker wired with Gibson lead, your humbucker is already wired like this. There’s no way to split the humbucker with a Gibson Lead.
SPLIT HUMBUCKER WIRING:
As stated earlier, when you split a humbucker, you’re rewiring the leads of the coils. Here’s what your humbucker looks like when it’s split:
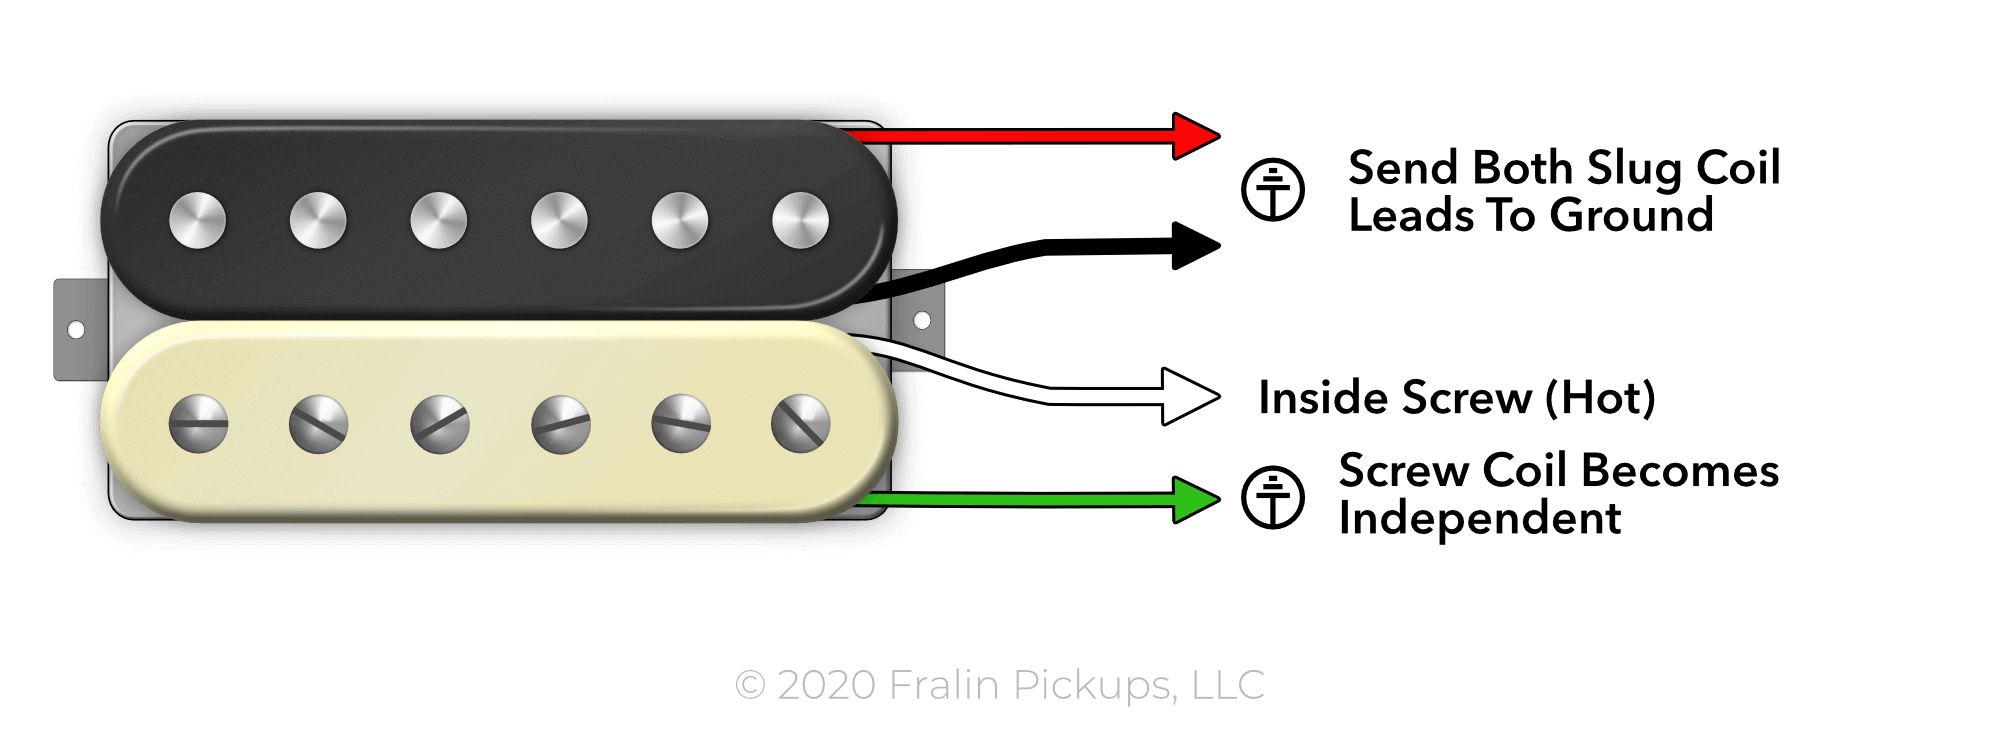
Two things have happened:
- You’ve connected the Red Lead of the Slug Coil to ground. As the Black lead of the Slug Coil already connects to ground, the entire coil connects to ground.
- You’ve also connected the Green Lead of the Screw Coil to ground. This allows the Screw Coil to remain functional.
HOW IT WORKS:
Using our Push-Pull Pot, we’ve connected out Red and Green leads to ground when we pull up. Here’s what’s happening under the hood:

As you can see, when the push-pull pot is in the down position, the Red and Green wires are not connected to anything else – the humbucker is in full-functioning mode.

When you Pull Up: Both the Red and Green lead now connect to a ground jumper to the casing of the pot, sending the finishes to the ground as illustrated above.
COIL SPLITTING VARIATIONS:
Depending on the lead you have, and the set-up you want, there are a few options you can perform. On a 3-Conductor Lead, Red refers to the Tap (coil finishes). On a 4-Conductor Lead, You have Red and Green As the coil finishes.
Also, depending on your guitar, you can coil tap two humbuckers at once, with one push-pull pot. Here are the variations listed below:
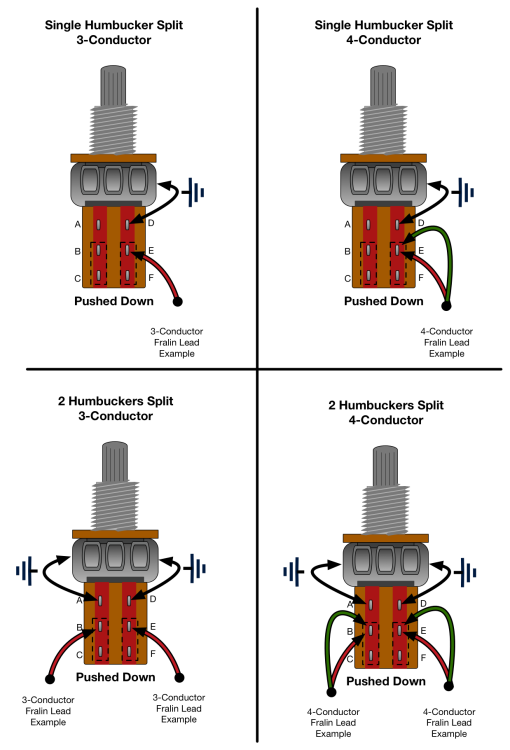
Let’s look at the bottom two images. You can split two humbuckers simultaneously by the same push-pull pot. As soon as you pull up, both humbuckers split at the same time. If you want independent control over your humbuckers, you need to use two separate push-pull pots, one for each humbucker.
Note: In the first two examples above, we’re using the “left” side of the switch. It really doesn’t matter which side you use – as long as the Ground connection is above it.
Well, that’s all for now. Stay tuned next month for our next article on Resistors in guitars, and Happy New Year!
Want more posts like this?
Subscribe for tone tips, tricks, and more.




I picked up a Washburn “A” model but someone before I got it did sum very weird and horrible wiring and soldering on it! It’s a double humbucker, (slugs/screws). It has a 3 tone toggle, a volume pod and a tone pod, but also has some kind of button, (that doesn’t seem to do anything), I’m thinking that’s where another tone pod went instead! So I picked it up for a $100 at a pawn shop, didn’t think It was that messed up but straight neck and fairly new looking and had locking machine heads that are very nice looking. If u can help me out with sum advice it would be appreciated, I’ll send you a pic of it and the rats nest wiring!! Thanks