Lindy’s Les Paul Wiring
Hey there! Today, we’re exploring the way Lindy likes his custom Les Paul® wired. Lindy’s favorite Les Paul is a Tommy Rodriquez Les Paul copy he designed himself, with a […]

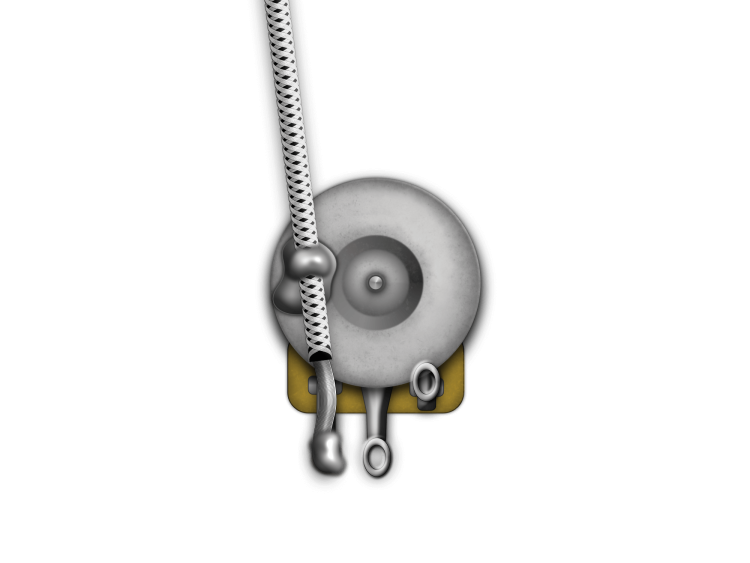
Working with Gibson Braided Lead can be a bit challenging at first, but it doesn’t have to be! This lead is a durable and straightforward style used for guitar pickups. It consists of a stranded hot wire, which is surrounded by cloth insulation and covered by metallic braiding. Here’s a brief overview:

The braiding (or shield) is always grounded, while the center wire is hot. Installing this lead involves soldering the braiding to the back of the pot to ground it, and connecting the center wire to a lug on the pot. In a Les Paul example, here’s how you would solder the pickup to the pot:
Grounding the braiding can be tricky, so we’ve compiled some tips to help you successfully manage your Braided Lead connections.
Both the braiding of the lead and the casing of the pot require a significant amount of heat to create a solid connection. However, applying too much heat can overcook the connection, potentially damaging the pot or burning the cloth insulation, which may result in the inner wire shorting out to ground.
The key to a successful connection is to pre-tin both ends before soldering. Pre-tinning allows you to connect the wire to the pot without the risk of overheating either component. Here are the basic steps to follow:
Watch Our Quick Tip:
Learn direct from Lindy how to solder Gibson Braided Lead. Without proper technique, you can damage the braided lead and short your pickup out.
By following these steps, you can ensure a reliable and safe connection!

1 Comments For This Post
Want to chime in to the conversation? Please do so! Please respect others.
Well, this is very interesting! This is the first time I see some doing this. Thanks for sharing!