How To Properly Wire A Toggle Switch For Guitar
3-Way Toggle Switches are very simple to install...if you understand them! Learn about Toggle Switches so you never have to reference a diagram again!

Installing an Output Jack is an essential skill to have under your belt. Installing it wrong, however, can give you a literal headache. At Fralin Pickups, we wire Switchcraft® Output Jacks on our Telecaster Control Plates all the time. This guide will teach you how an output jack actually works, so you never need to Google a diagram again.
To understand how an Output Jack works, it’s best to start with the guitar cable. The cable sends your pickups’ signal through your amp and speaker, and part of the signal to Ground. Let’s take a look at a guitar cord and dive in:

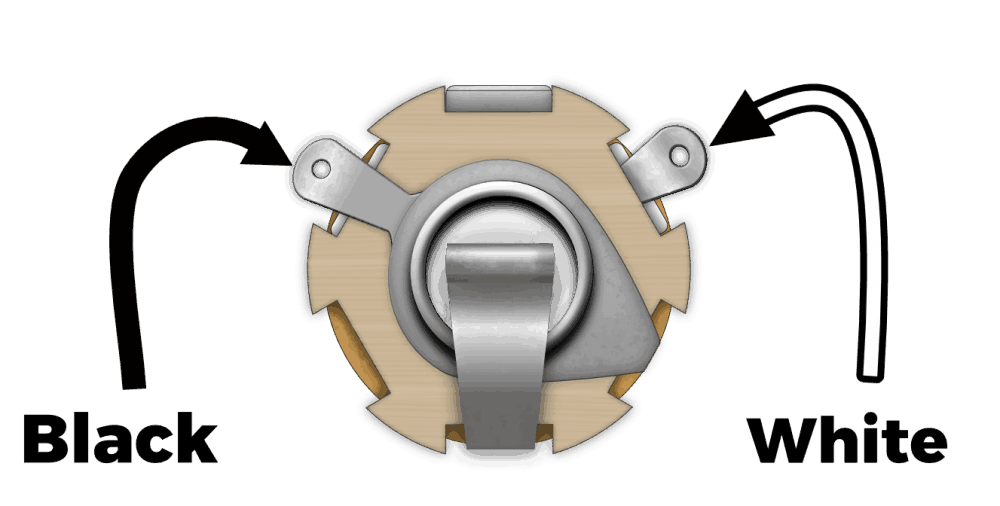
On a cable, the Tip is the “Hot” signal – your music. The Sleeve is the Ground signal that contains unwanted noise from your guitar. Also, there’s a black plastic piece separating the two. Wiring the Output Jack backwards would reverse these – not what you want to do! Follow the following diagram to show you how to install this effectively:
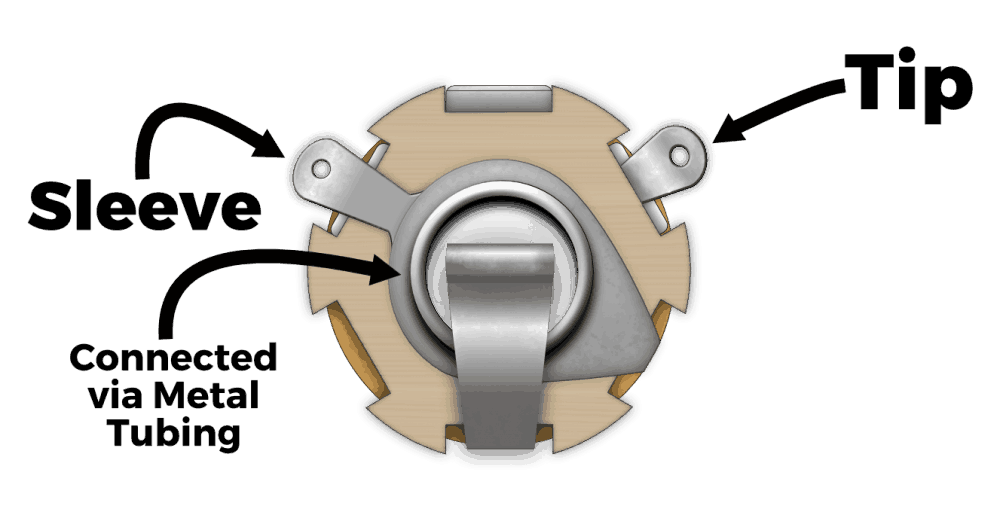
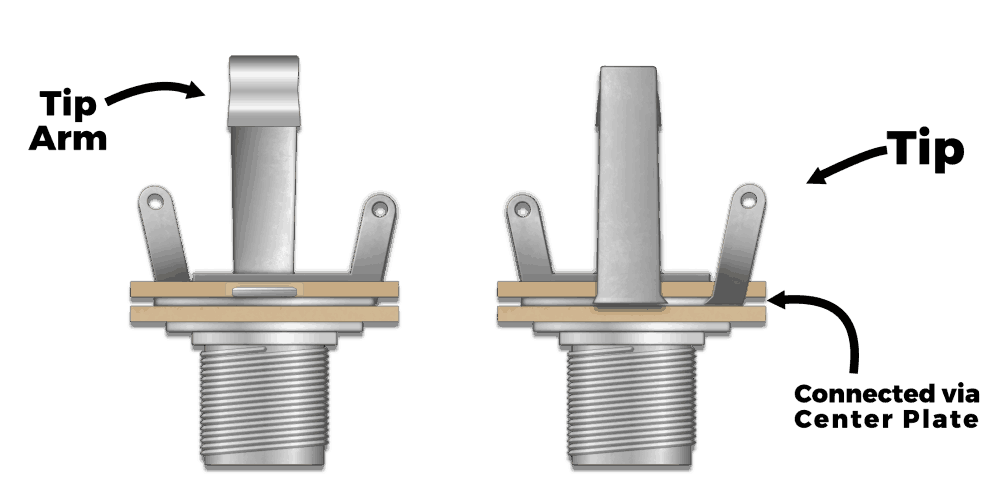
When you insert your guitar cable, the guitar cord is slid through a metal tube. This tube is the Sleeve, or the Ground connection. Also, when you insert your cord, you should notice a “snap”, securing the cord in place. That “snapping” feeling is the tip of the guitar cord locking in to the Tip Arm (pictured below). The Tip Arm is completely separate from the rest of the Jack, being sandwiched between two layers of Phenolic.
There are a few things going on when you insert your guitar cord. The Sleeve is coming in contact with the Metal Tubing, and the Tip is locked in to the Tip Arm. Now that you know how it works, you can easily identify the correct way to install the wires.
Installing the jack is very simple, but there’s a few important steps to perform before you begin. Before you install, it’s important to do two things: 1.) pre-tin your terminals, and your wire. 2.) put a kink in the tip of your wire to create a mechanical connection. Creating a mechanical connection will ensure a strong connection.

We hope that this guide is useful to you. As always, more to come! Thanks for reading.

44 Comments For This Post
Want to chime in to the conversation? Please do so! Please respect others.
Thanks for a very easy to read and see diagram. I bought a used Squire pick guard with 2 pickups supposed to have 3 but it was only 5 bucks. No output jack, just need to find a used Squire body and I’m ready to go. Don’t solder or play but at 73 I just got a wild hair.
Thanks for the writing. I was rewiring my guitar last night and found what you wrote, very helpful.
Love your pickups
Thanks for the Information.
Hey so I’m doing a guitar with two humbuckers and a single coil for the center with volume only how would I wire it to the output?
how to change barrel jack on Heartfield DR5 bass guitar not much room
Hello Ty,
So I bought a used guitar from sweet water and it cut in and out. I pulled the jack assembly out and the white wire (tip) is there but the black wire (ground) is completely missing. It’s not even present on the jack. So I can solder a new wire onto it but I don’t know where the other end terminates. Can you please help me? This is a les Paul knock off guitar
Good info on the wiring and soldering did it .white on the tip soldered to ground from the pickups the black from the sleeve to main ground wire then to the bridge very effective.
I’m looking at a Kramer 200VT. Someone dd horrible things to the wiring harness and jack. I also notice that it looks like the sleeve (ground) of the jack is soldered to a bit that disappears under the harness compartment. Is it possible that there is a ground shield for the entire compartment?
Hey Ty, yes – it’s possible someone has shielded the entire compartment. If that’s the case, the shield needs to connect to ground in order to be effective. I would ask for more photos to be sure.