Prewired Telecaster Pickguard Install Guide
Congratulations on your purchase of Fralin’s Prewired Telecaster Pickguard! We’ve made installation super simple. If you’re uncomfortable soldering or working on guitars, simply bring this pickguard and your guitar to an experienced luthier for a professional installation.
This installation guide covers our Prewired ’72 Deluxe Pickguard, Prewired Thinline ’72 Pickguard and Prewired Custom ’72 Pickguard.
Installation Overview
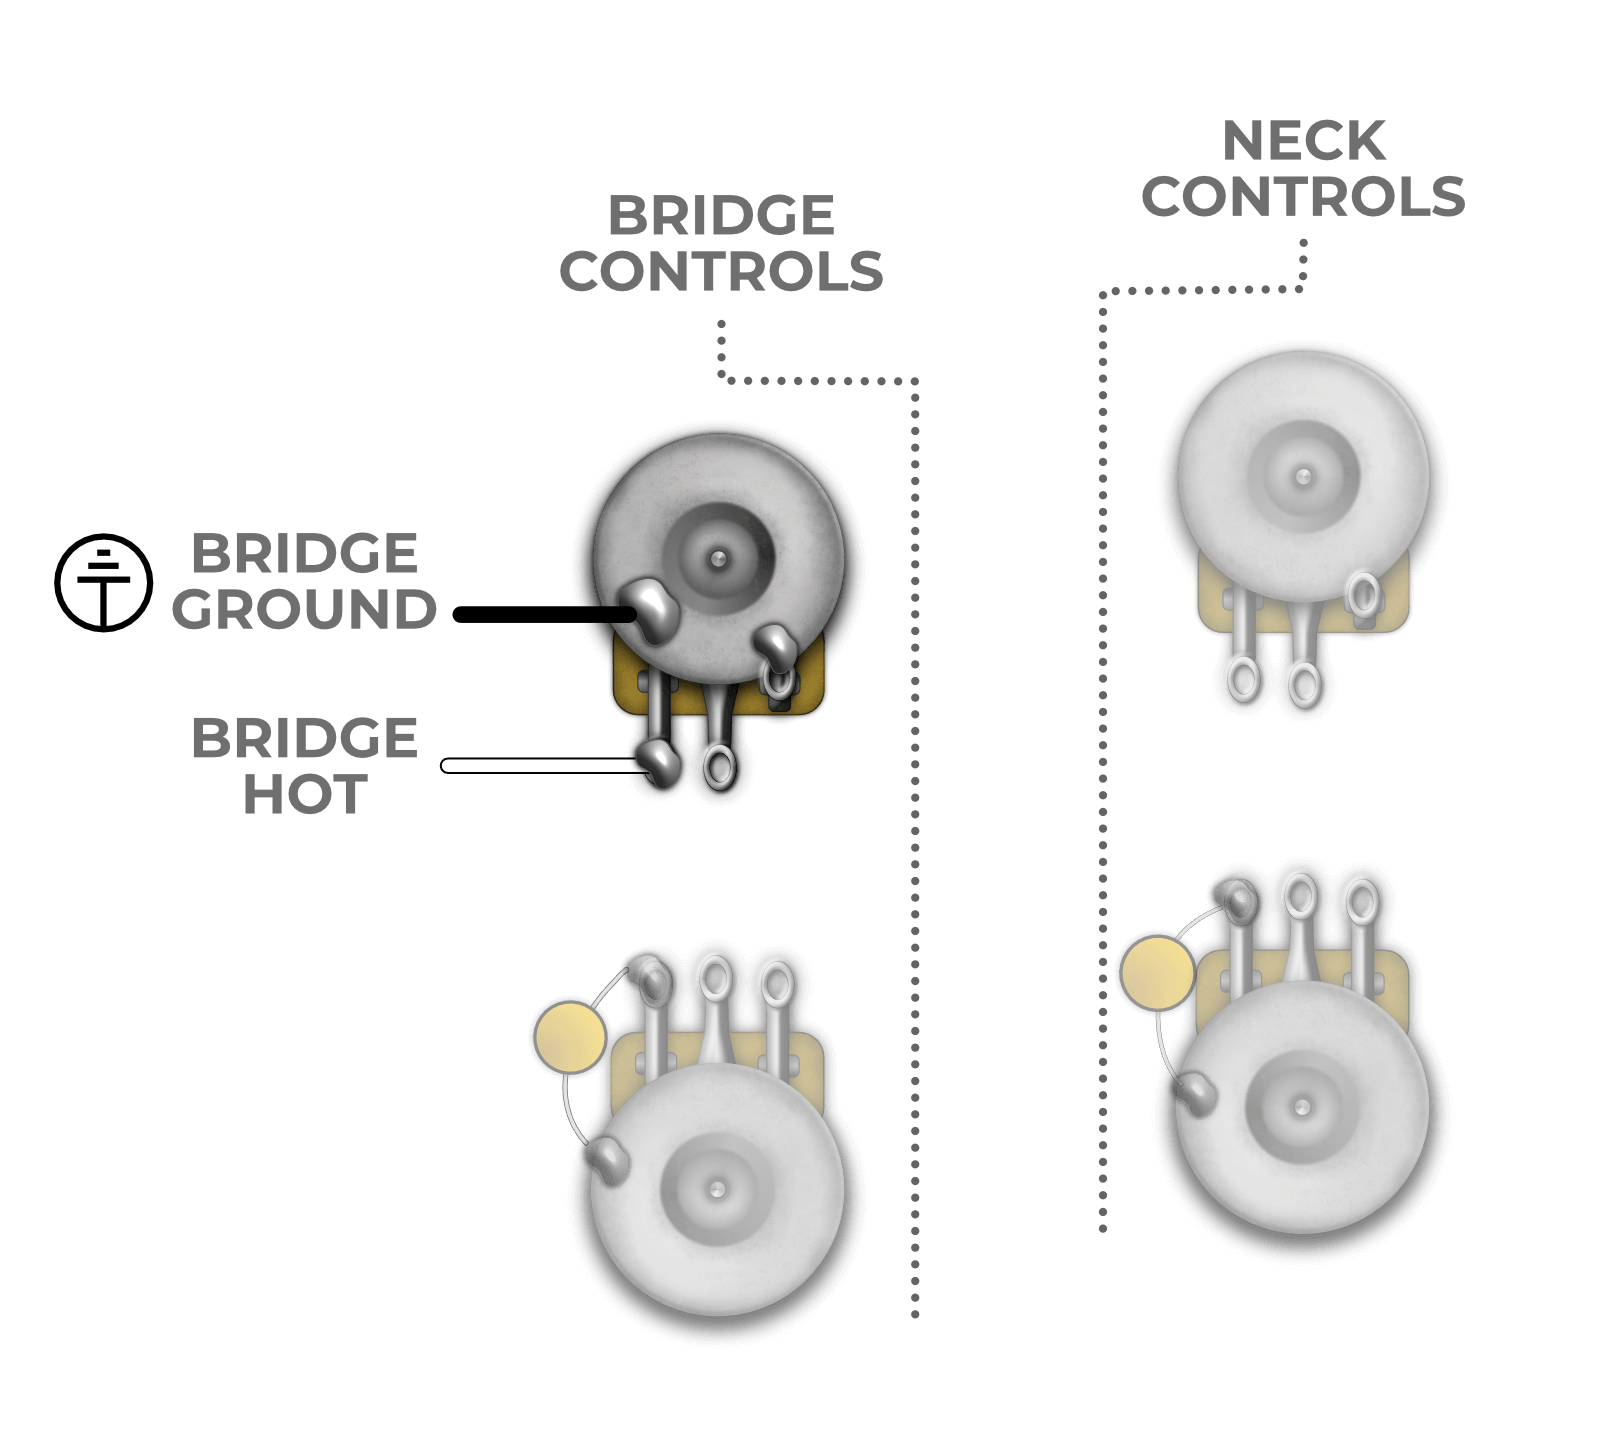
After removing your existing pickguard from your instrument, you’ll need to solder at least two wires on the new pickguard. Each pickguard features one White and two Black wires. Here’s where they go:

Note: For the Prewired Custom ’72, see the note below.
Installation Steps & Tools Needed:
You’ll need the following tools to install the Prewired Pickguard:
- Soldering Iron & Solder (We use Kester 60/40)
- Phillips head screwdriver (For removing pickguard and output jack mount)
- Wire cutters (for trimming excess wire, if needed)
- 1/2″ Hex Nut Driver (for uninstalling and installing the output jack)
Step 1: Prep guitar for installation
- Remove the strings from your guitar
- Unscrew the Jack Mount plate to expose the output jack
- Use the 1/2″ Hex Nut Driver to unscrew the hex nut while holding the output jack from the back to uninstall the output jack from the plate
- Unsolder the leads connecting the output jack (if replacing the jack, simply snip the leads off)
Step 2: Remove the Existing Pickguard
Next, simply unscrew all pickguard screws and put in a safe place. The pickguard should wiggle free and lift out of the guitar.
Cut or unsolder any of the ground connections holding the pickguard in the guitar. You will need to solder these connections back on the new pickguard.
With all the Ground connections removed from the pickguard, you may now remove the existing pickguard from your guitar.
Step 3: Install the New Pickguard
With the old pickguard out of the way, we can now proceed to install the new pickguard! It’s a good idea to lay the pickguard down to make sure everything fits and the holes line up. If the mounting holes do not line up, mark the new location and drill a 1/16″ pilot hole for the new screw location. This is a simple, non-invasive way to make sure the new pickguard fits perfectly. Wire it up according to the image above.
Install the Jack to the Jack Plate, wire it up, screw everything back in, and plug the guitar in before stringing it up to make sure everything works.
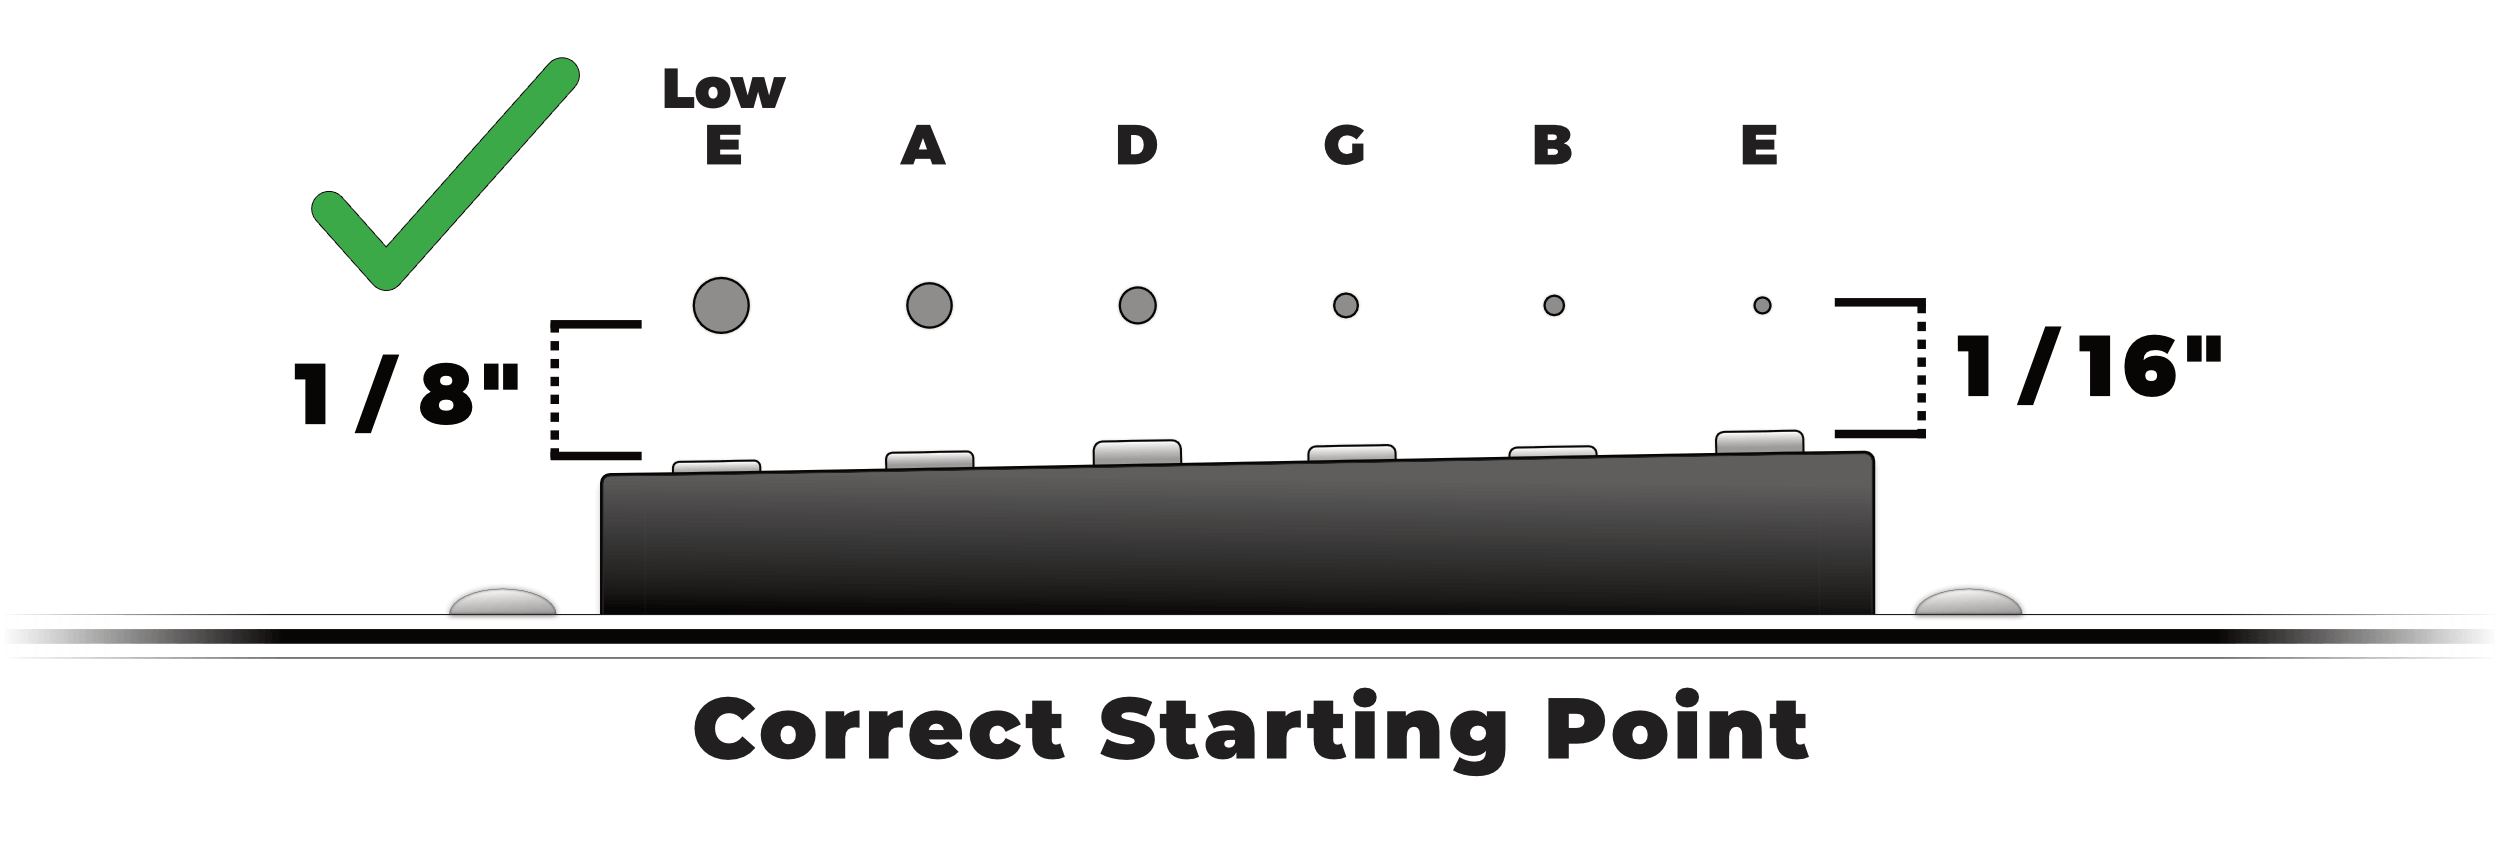
Final Step: Adjust Pickup Heights
Finally, adjust the height of your pickups to the appropriate height. We have a whole guide for you to follow here. Here’s a cheat sheet to get it up and running quickly:
Prewired Custom ’72 Installation
For the Prewired Custom ’72 Pickguard, you’ll need to solder the Bridge pickup independently of the pickguard. When the string are off, remove the Bridge assembly and install the Bridge Pickup according to this wiring diagram: