
Prewired Telecaster Harness Install Guide
In this guide, we’re showing you how to install our Prewired Telecaster Harness. Installation is super simple, and most can handle it with without the help of an experienced luthier. That said, if you’re uncomfortable with soldering, take your guitar and harness for installation. Doing it yourself? Let’s dive in.
Tools Needed:
- Soldering Pencil & Solder (We use Kester 60/40)
- Wire Cutters (for trimming excess wire)
- Screwdriver
- 1/2″ Hex Driver (For removal and installation of pots).
Installation Overview
In a nutshell, you’re simply removing the existing electronics or control plate, and replacing them with the new ones. You want to be careful to label each wire so you can put them back where they belong.
Step 1 – Remove your existing harness
- Unscrew the two screws holding down the control plate to the body
- Remove the guitar’s jack cup (Some feature two screws, others are press fit)
- Carefully flip the control plate over, and identify where each wire goes. Most Telecaster pickup wires exit in logical places, you can easily see which wires belong to the Bridge and Neck pickup, respectively.
- Unsolder and label each wire – you should only need to unsolder a White and Ground for simple setups. Ground connections are usually soldered to the casing of the volume pot.
- Use the 1/2″ Hex driver to remove the output jack, if it has it – if no hex nut is present, you have an Electrosocket jack mount and the jack is threaded into the jack mount itself. Unthread it.
- Once everything is unsoldered, the existing control plate should be able to lift out of the control cavity freely.
Step 2 – Transfer Hardware (optional)
If you did not purchase a completed Harness with a plate and knobs, you’ll need to transfer your plate and knobs to the new harness.
- Remove the Harness from the harness board
- Install your existing plate, knobs and switch
Step 3 – Wire it up
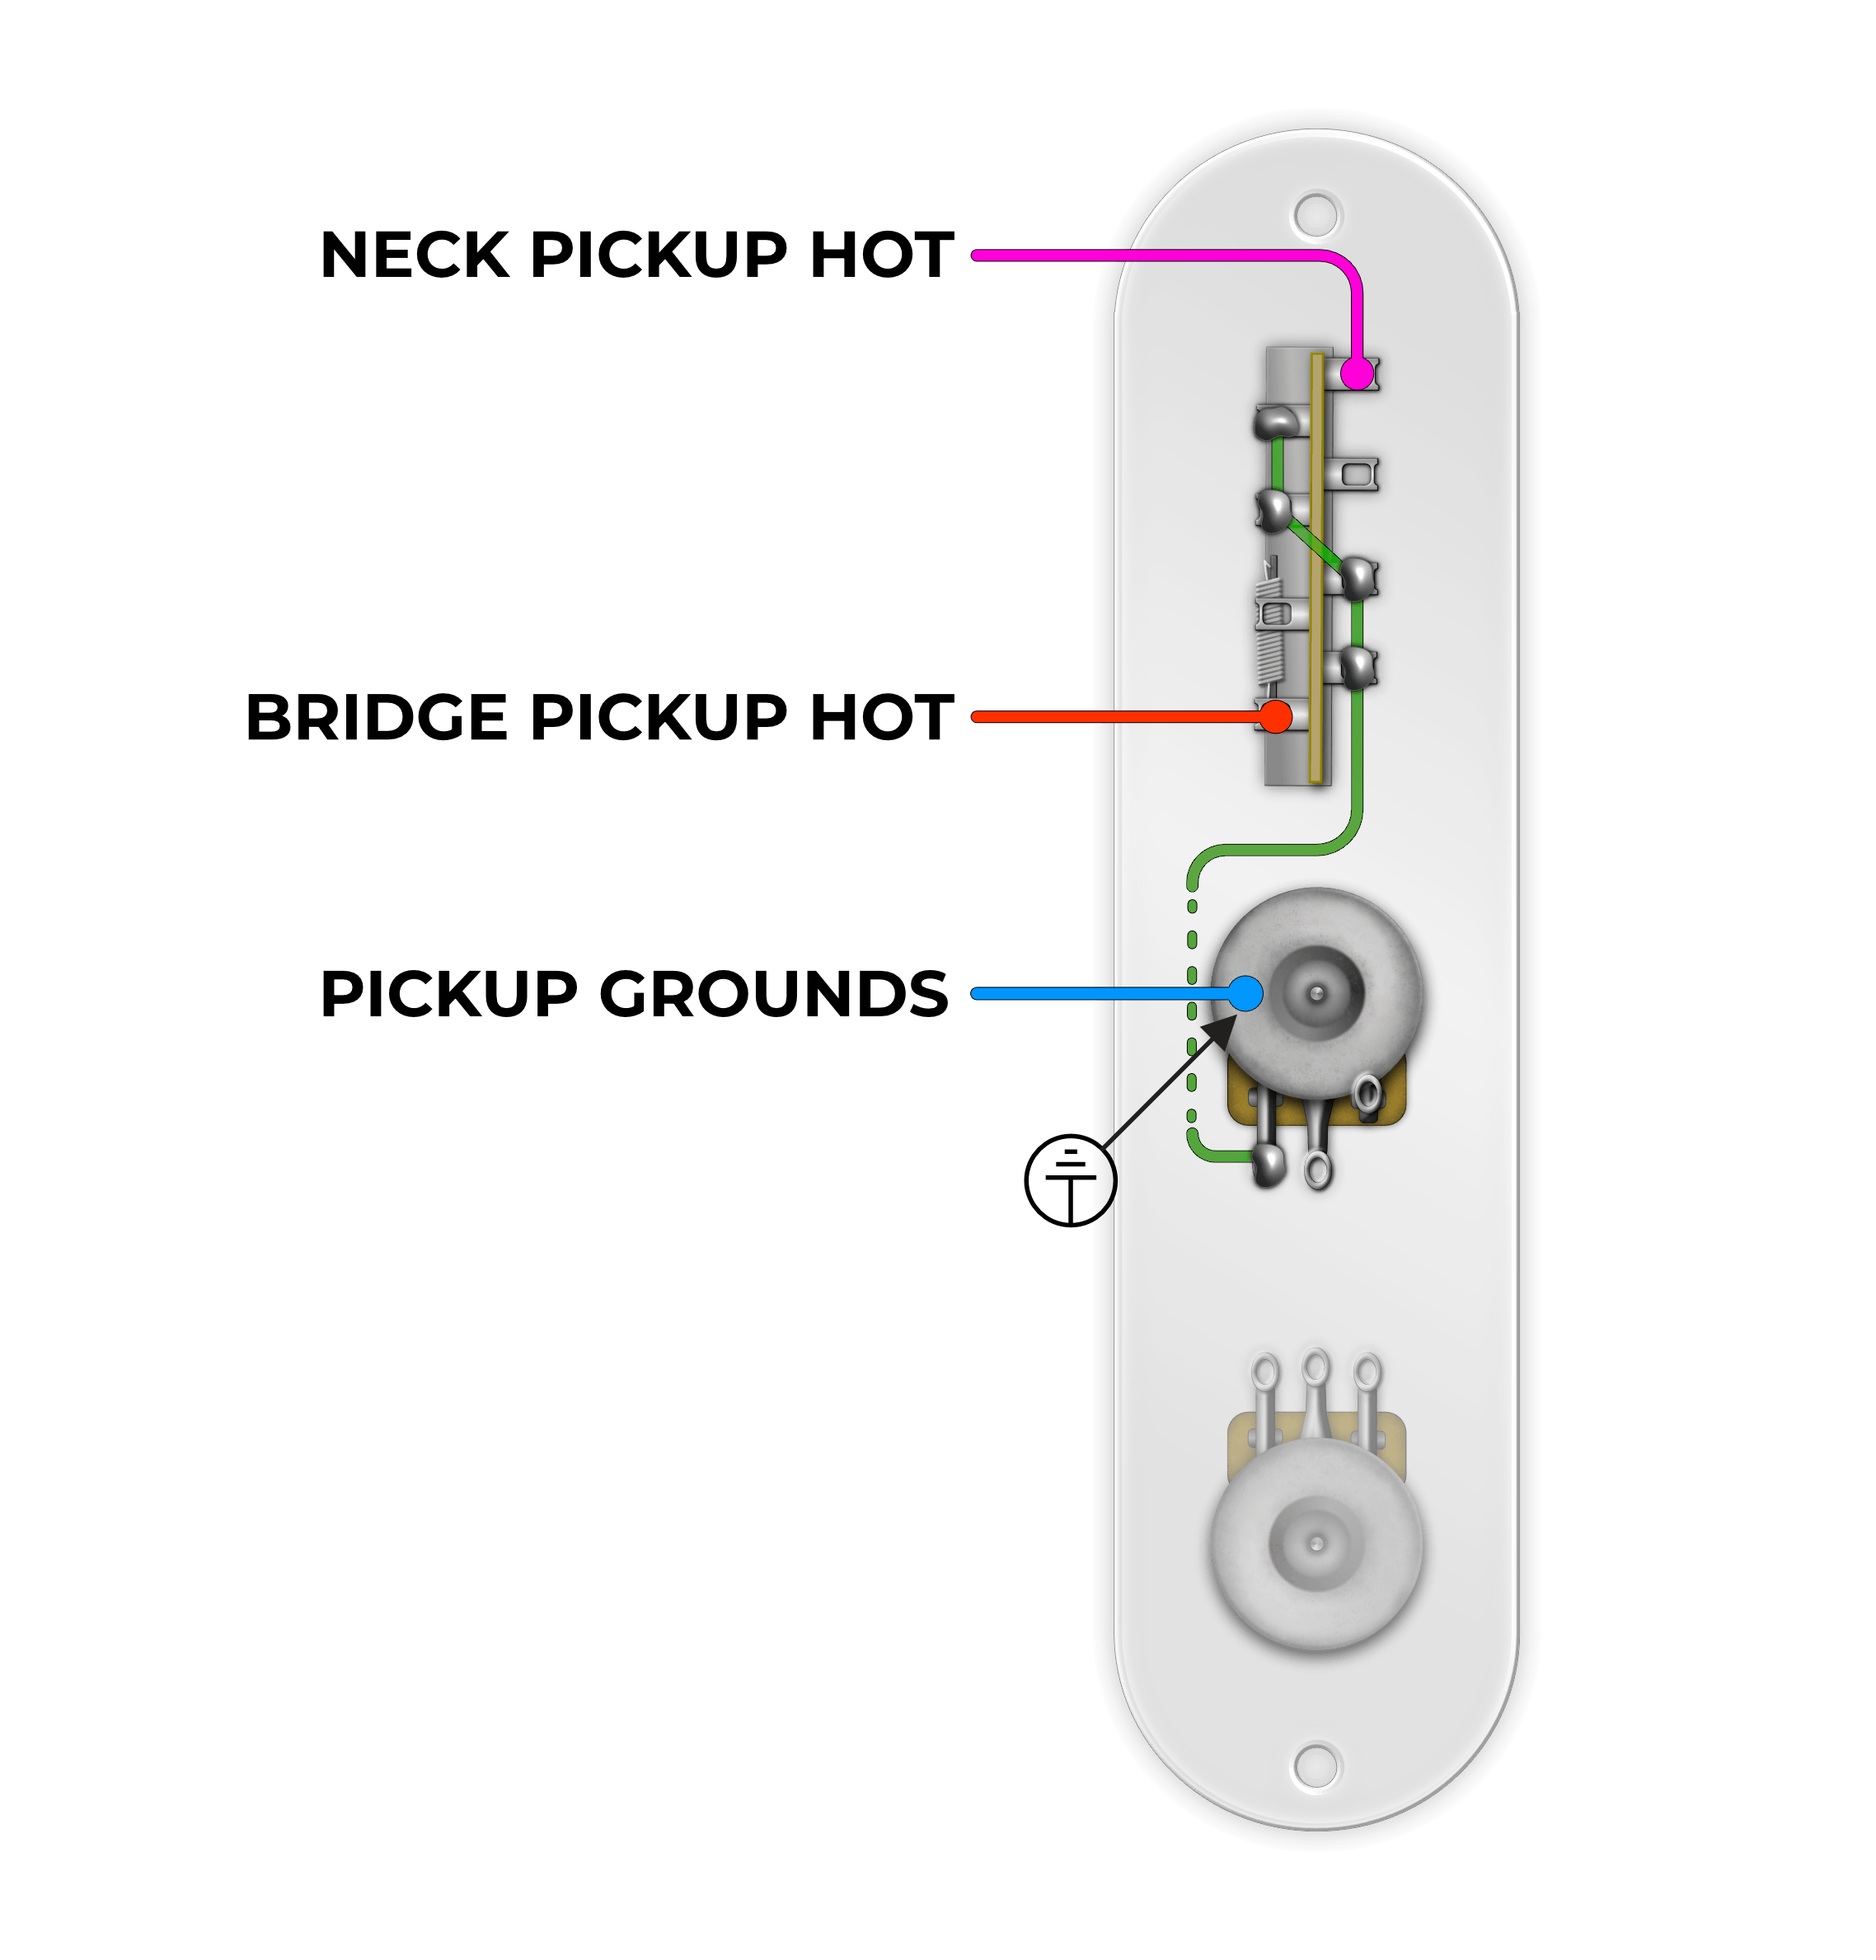
We’ve made this as simple as possible. If you purchased your harness with push pull modifications, you’ll see marker wires with a label (i.e. Bridge White). These marker wires are designed to be removed by unsoldering them and carefully placing the corresponding wire in it’s place. If you don’t see marker wires, you ordered a simple plate and the wiring is as such:
Normal Orientation
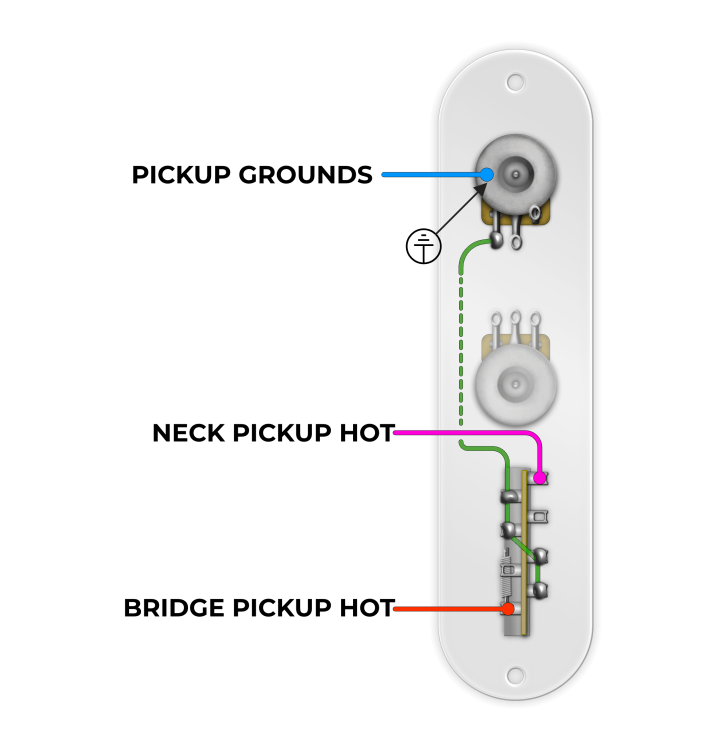
Flipped Orientation
Step 4: Reassemble
Once your soldering is complete, perform the following steps:
- Install the new output jack into your existing Jack mount or plate
- Flip the control plate to it’s normal place and use the screws to install it
- Test the guitar by plugging it into an amplifier (low volume) and playing it
That’s it! Installation of our Prewired Telecaster Harness is complete. It’s quite simple. Enjoy your new harness!